

Remember those old timey silent movies? A guy with a dashing moustache flirting with a girl, and they talk and talk, but you have no idea what they're saying?

Well, if you are posting YouTube videos on your YouTube channel but aren't providing your viewers with subtitles, then most likely, that's what their viewing experience is like.
Not exactly what you were aiming for? You know what to do! It's time to add subtitles to YouTube videos you post.
YouTube Subtitles
You've probably noticed that an overwhelming majority of videos you watch have subtitles, but have you wondered why that is?
A staggering percentage of people nowadays watch YouTube videos on mute - whether it’s because they're in public, or they're listening to music at the same time. And that doesn't even account for the millions of people worldwide who have some degree of hearing loss.
That is why closed captions are a must on every YouTube video which includes talking. When you add subtitles to video, and especially if you add translations in other languages too, you are making your video more accessible and widening your audience pool.
Sounds good?
Then let's get to it!
How to Enable Auto-Generated YouTube Video Subtitles
If you don't have subtitles that you want to upload with your video, you can try out the closed captions that YouTube offers. These are auto-generated so be prepared that the quality and accuracy might be iffy, but they could work in a pinch.

However, make sure you review the subtitles before posting them. YouTube even has a disclaimer on their page that urges you to do that, since the results from the voice recognition AI are of mixed quality. Also bear in mind that there is a limited list of languages that they support.
YouTube will generate the subtitles on its own. There's nothing in particular that you have to do apart from uploading the video. It might require a bit of patience, because the subtitles are usually not available immediately. Once they've appeared, you can review and edit them by following these steps:
1. Go to YouTube Studio
Your first step is to log into YouTube and go to your YouTube studio. On the left side of the screen, pick a video you want to work on.

2. Select Your Video
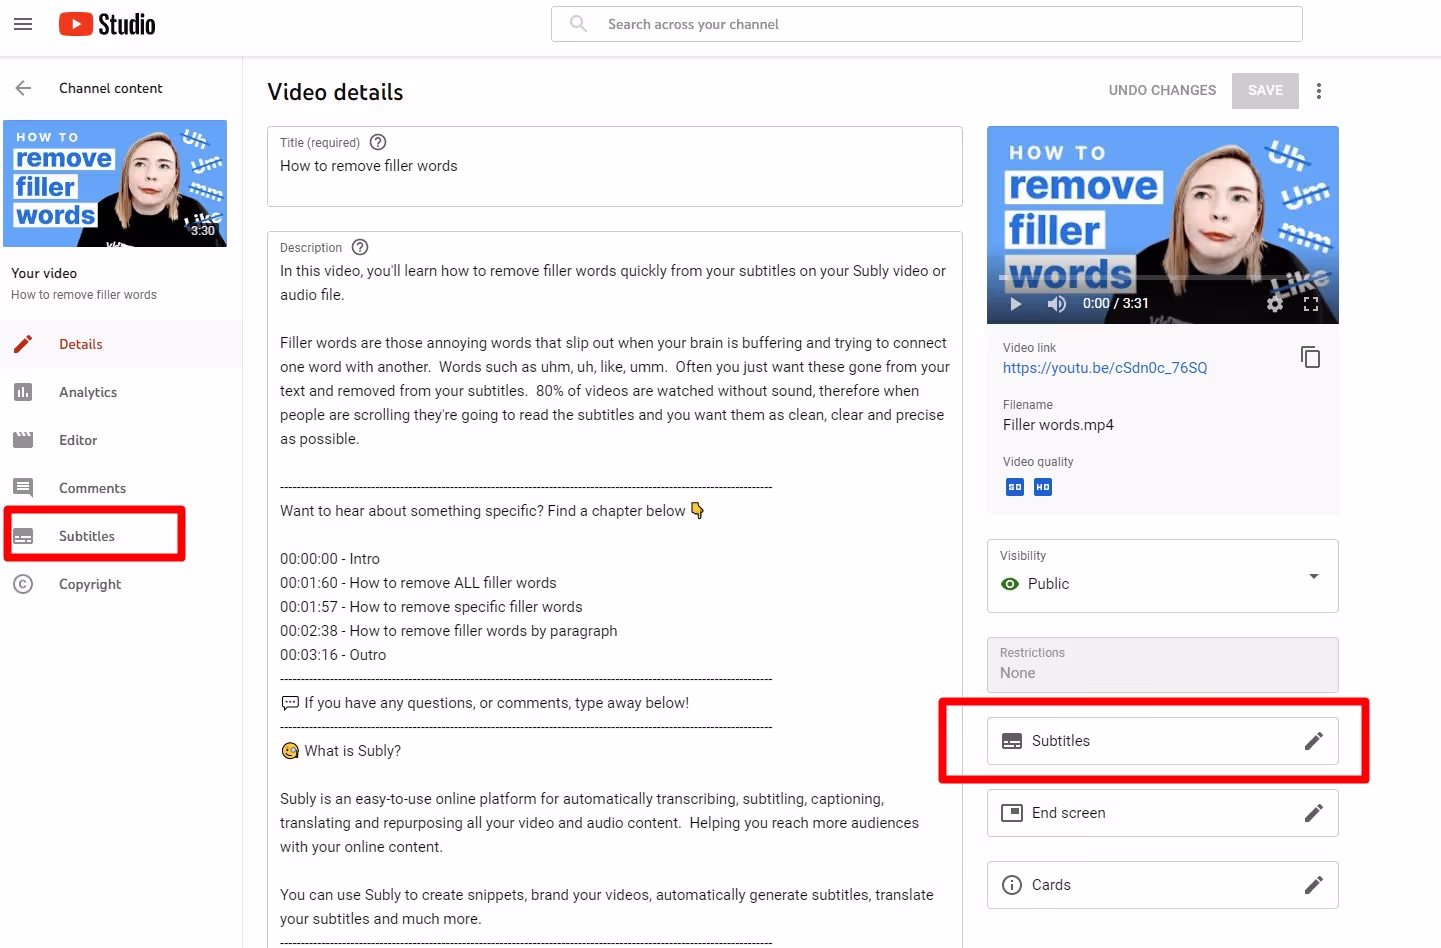
Out of the list of your videos, select the one you want to work on and open Video details. On your left side, you’ll see the Subtitles tab. Use that if you want to add subtitles in different languages. If you want to edit the generated subtitles, click the option on the right.
3.Edit Your Automatic Subtitles
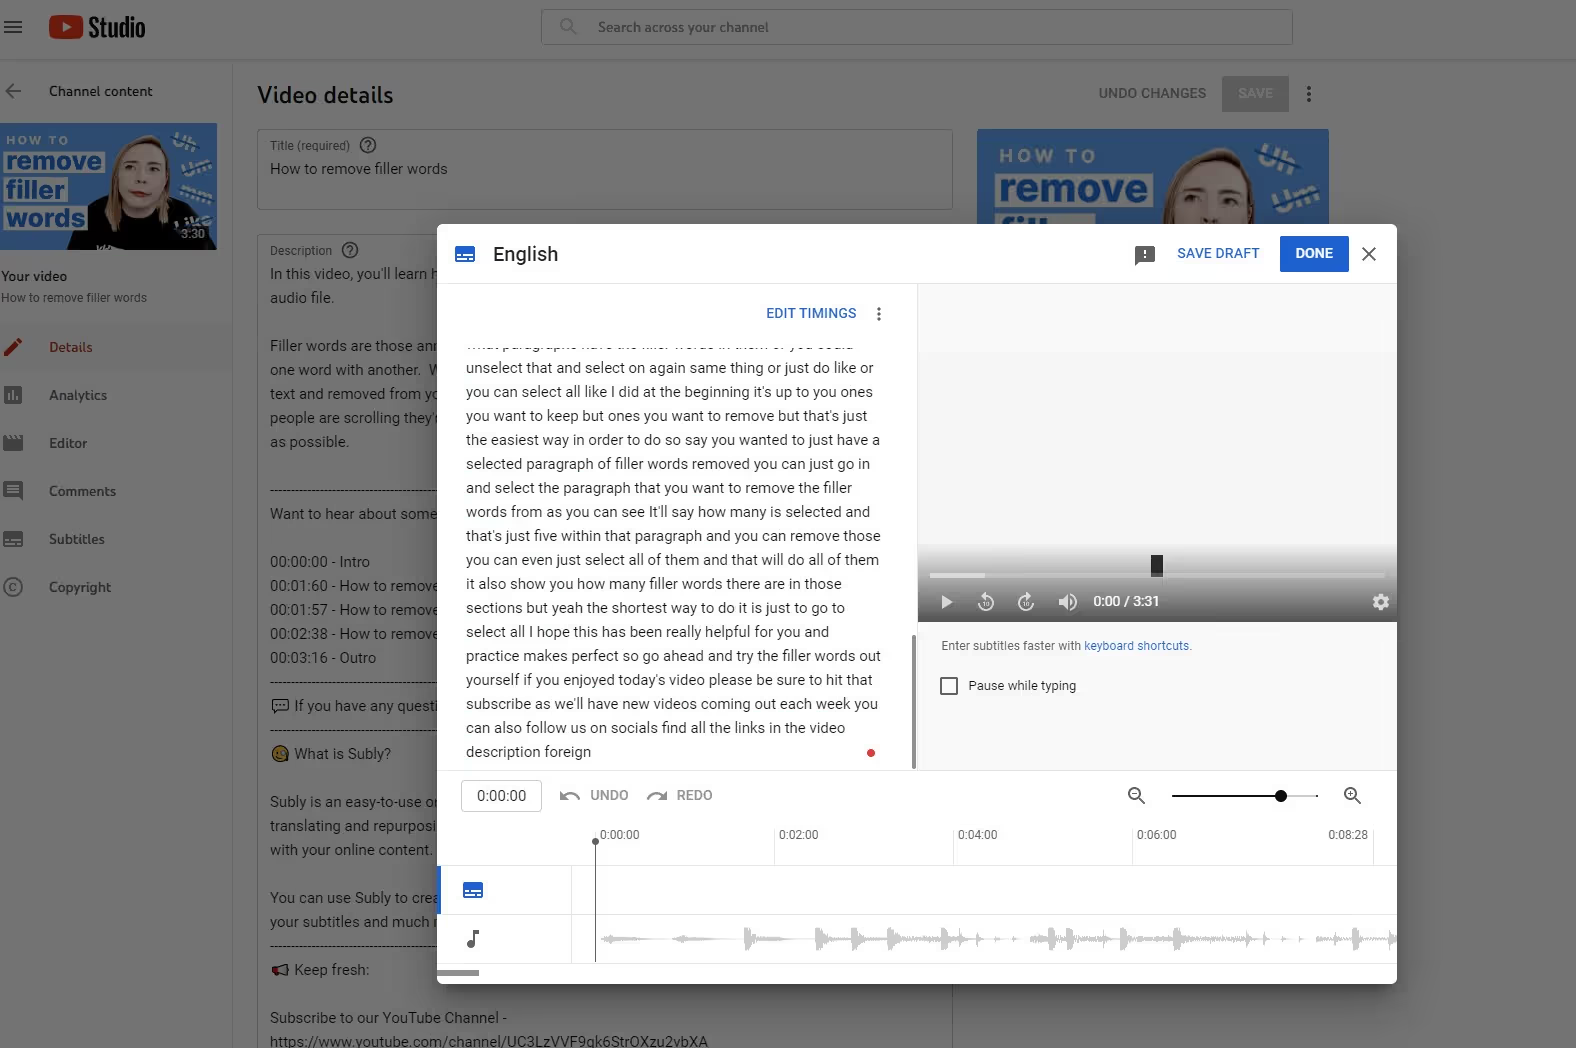
Your subtitles should appear now, and you can review them for accuracy. If you find any mistakes, you can edit them or even remove parts that shouldn't be there.
How to Manually Add Subtitles with YouTube Automatic Transcript Sync
If you don't want to rely on the auto-generated subtitles and hope for the best, you can always take the time to enter your own transcription for your video. If you do decide to add subtitles to YouTube videos manually, bear in mind that, depending on the length of the video and the amount of talking in it, the playback method can be an incredibly time-consuming and laborious process.
1. Go to the YouTube Video You Want to Add Subtitles to
Log into your YouTube account and then go to your videos. You can do this either by clicking My Channel on the left side of the screen, and then picking the Video Manager option, or by clicking on your account icon. From there, go to your YouTube Studio and then pick the Video Manager.
2.Go to the Subtitling Interface
Once you've navigated to the video you want to subtitle, select edit. Out of the drop-down menu, select "Subtitles and CC".
3. Choose a Language and Create Your Closed Captions
In your subtitling interface, look for the button that says "Add new subtitles", and then proceed to click "Create new subtitles or closed captions". Select the language you want your subtitles to be in.
4. Enter Your Subtitles
It's time for video playback. Watch the video, listen to the words being spoken and enter them in the text box. You can enter the subtitles by clicking the blue button with the plus sign. Once you've done that, your subtitles will appear in the video. You can tweak the exact timing the text appears on the screen by dragging the time bar left or right.
5. Alternatively, Use Auto Sync
If you don't want to set the timing of the captions manually, turn on the auto-sync option. You can do that by clicking the button that says "Set timings". This feature allows the subtitles to be automatically synced with the spoken text in the video.
6. Save Your Subtitles
Once you are done, and your video subtitles are complete, it's time to click save. In the upper right corner, you will find the blue "Publish" button. Once you've clicked it, your video subtitles will be saved and available for use.
How to Upload External Subtitles to YouTube
Uploading an external file with captions is the option that allows you to have good quality subtitles without wasting precious hours of your life doing it.
YouTube supports several subtitle formats, but the most common and simple option is to use an SRT file.
Here's how it works.
1. Go to Subly
To start, go to getsubly.com to create your subtitles file. You can either upload the video to Subly directly, or copy and paste the URL from YouTube. Keep in mind that video needs to be set to ‘Public’ for this option to work.
2. Create and Edit Your Video Subtitles
Subly will generate your captions quickly and accurately. Once they are done, you can review them and check for accuracy, and make edits if you want to enhance the quality, but in most cases that is not necessary.
3. Export Your Subtitles File
Subly supports a huge number of file formats. For YouTube videos, most people use the SRT file format, but other options are available too. Once you are satisfied with your captions, export them and save them. Now you can use them to upload on YouTube, or for a number of other uses.
4. Go to YouTube and Find Your Video
Go to YouTube and log in. In the left sidebar choose "My Channel". This is where you can find the controls for the content that you upload, closed captions included. Once you're in, you need to find the actual video you want to add subtitles to. You can do that by selecting "Video Manager" at the top left of the screen or in your YouTube Studio. When you click that button, you will see a list of all of your YouTube videos.
5. Add Subtitles to Your Video
Next to your videos, you will find an edit button. When you click on it, you will see a drop-down menu. Click on "Subtitles and CC" to add your subtitles. Once you have the subtitling interface open, press the button "Add new subtitles" and select "Upload a file" from the drop-down menu.
6. Upload Your Subtitles File
In the pop-up menu that appears, you can either choose to upload a transcript or a subtitles file. Select "Subtitles file" and then choose and upload your SRT file.
Bear in mind that having a transcript can also be very useful, especially when it comes to SEO, so it might be something to consider in the future.
7. Review and Publish
Once you have uploaded your file, you can use playback to make sure everything is in order and the subtitles are synced with the video. Subly's export files have timestamps, so generally no edits or tweaking is necessary.
Once you have made sure everything is in perfect order, press "Publish". That's it, you're done! Your video now has subtitles.
Once you have created your captions with Subly, you're sure to find plenty of uses for them even after you have added them to your YouTube videos.
Your subtitles are a tool that can help you promote your videos in a countless number of ways. Whether you use them as material for blog posts, social media promo, or as an SEO magnet, they are sure to bring your videos engagement and new audiences.


